 Save
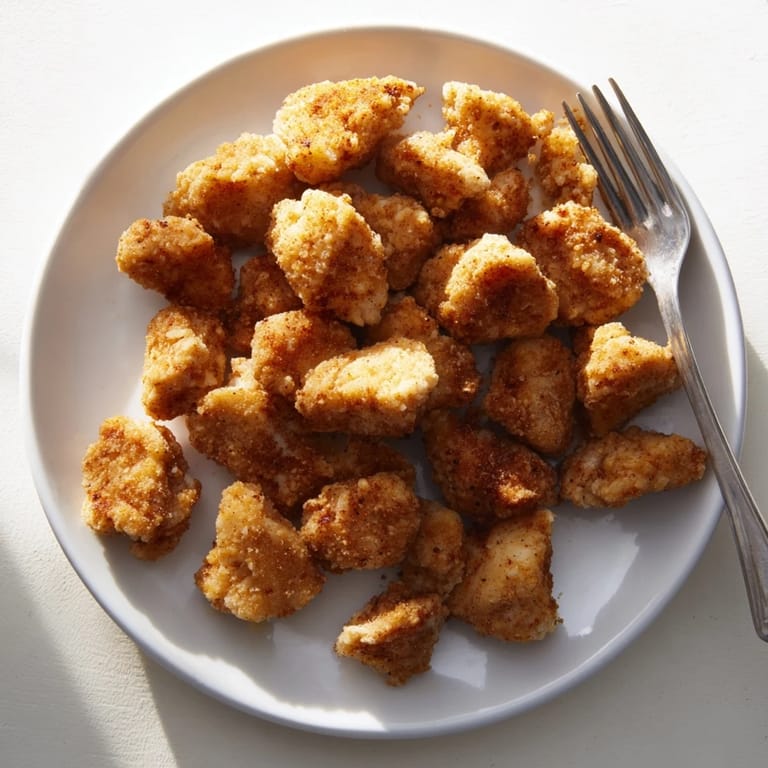
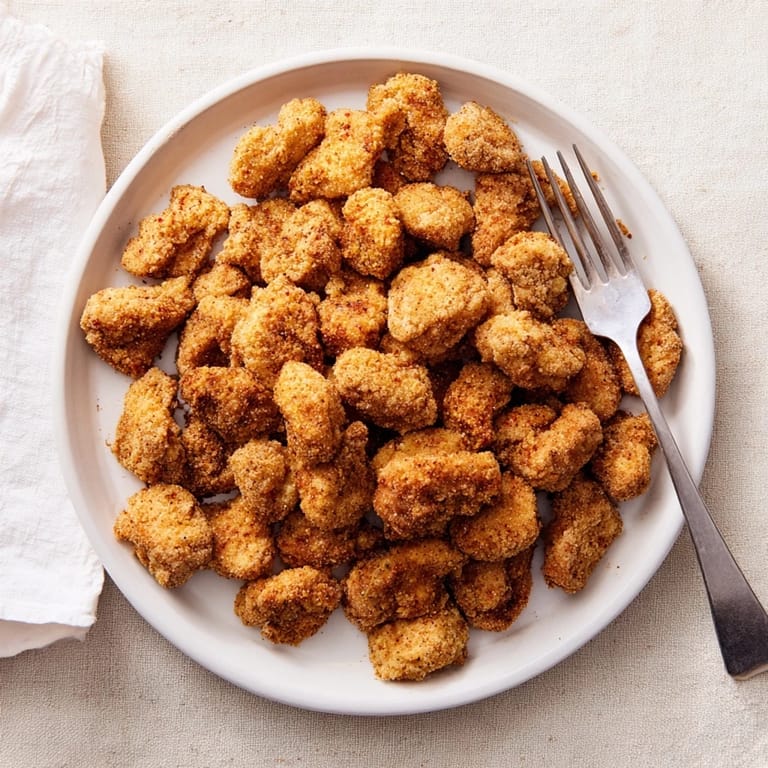
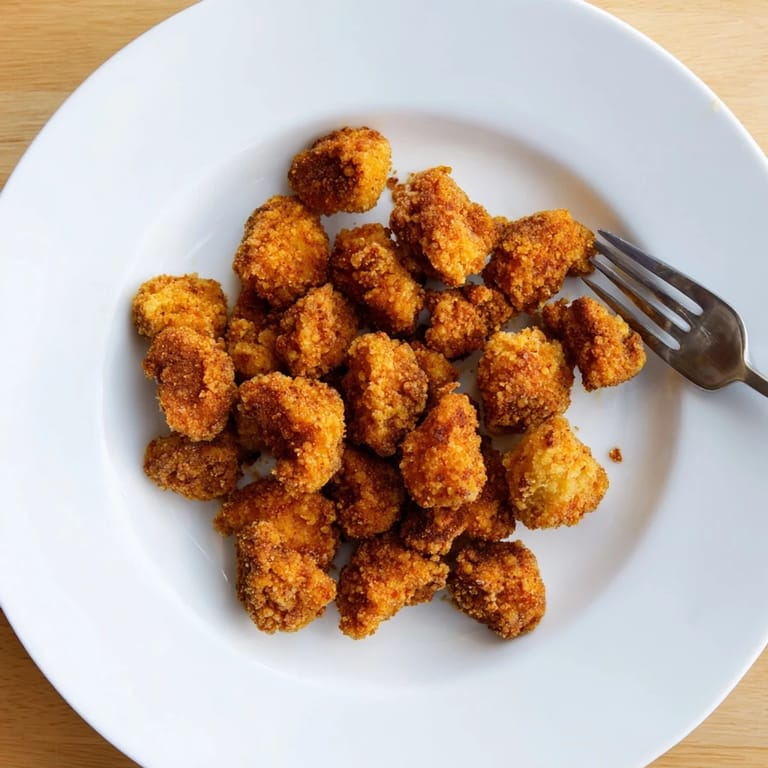
Save The first time I made popcorn chicken for a gathering, I watched the bowl empty in under ten minutes. Someone asked if I'd secretly ordered takeout, which I took as the highest compliment possible. There's something irresistible about bite-sized pieces of chicken that crunch when you bite into them, revealing juicy meat inside. Now I keep the ingredients on hand for impromptu movie nights or when friends drop by hungry.
Last winter during a snowed-in weekend, my roommate and I spent the entire afternoon perfecting our popcorn chicken technique. We tried different spice blends and frying temperatures until the kitchen smelled like a fairground. By evening we had stacks of golden bites and had invented three new dipping sauces. That day turned into a monthly tradition we still look forward to.
Ingredients
- 500 g boneless chicken: Thighs stay juicier but breasts work perfectly too, just cut everything into uniform pieces so they cook evenly
- 120 ml buttermilk: The acidity tenderizes the meat while creating the perfect base for spices to cling to
- Garlic and onion powder: These two work together to build that savory depth you taste in restaurant versions
- 150 g all-purpose flour mixed with cornstarch: This combination creates the lightest, crunchiest coating that won't get heavy or soggy
- Baking powder: The secret ingredient that makes the crust bubble up and become extra crispy and airy
- Paprika and cayenne: Balance the heat to your preference, remembering that cayenne packs quite a punch
- Vegetable oil: You need enough depth to submerge the pieces completely without crowding them
Tired of Takeout? 🥡
Get 10 meals you can make faster than delivery arrives. Seriously.
One email. No spam. Unsubscribe anytime.
Instructions
- Marinate the chicken:
- Toss your cut pieces into the buttermilk mixture and let them soak up all that flavor for at least 30 minutes, though a few hours in the fridge makes them even better
- Prepare your coating station:
- Whisk together the flour, cornstarch, baking powder, and spices in a wide bowl so you can easily coat each piece
- Heat the oil properly:
- Bring your oil to 180°C or test it by dropping in a pinch of flour—it should sizzle immediately and float to the top
- Coat for maximum crunch:
- Dredge each marinated piece in the flour mixture, shaking off excess, then optionally dip back in buttermilk and coat again for that restaurant style double crust
- Fry in batches:
- Cook only enough pieces at once to maintain the oil temperature, about 3 to 4 minutes until deep golden brown
- Drain and season:
- Let the finished pieces rest on a wire rack rather than paper towels to keep them crispy on all sides
 Save
Save My nephew used to be picky about anything homemade, claiming it never tasted as good as the drive-through version. The first time he tried this recipe, he went silent for a full minute before asking if I could make it for his birthday party. Watching someone discover that homemade can actually beat takeout has become one of my favorite kitchen moments.
Making It Ahead
You can cut and marinate the chicken up to 24 hours in advance, which actually intensifies the flavor. The breading mixture can also be prepared ahead and stored in an airtight container. Just never bread the chicken until you are ready to fry or the coating will get soggy and lose its crunch potential.
Perfecting The Crunch
The double coating method is what truly sets this apart from standard fried chicken. That second layer of buttermilk and flour creates those delicious crispy ridges and bubbles. If you are short on time, a single coating still produces excellent results, but the extra step is worth it for that authentic popcorn chicken texture.
Serving Ideas
Set up a dipping sauce bar with ranch, honey mustard, and a spicy barbecue sauce for everyone to customize their experience. These also make incredible toppings for loaded fries or as the protein in a generous salad.
- Keep finished pieces warm in a 200°F oven if you are making a large batch
- Season immediately after frying while the oil is still hot for the best adherence
- Let the chicken rest for at least 2 minutes before serving so the juices redistribute
 Save
Save Every time I make a fresh batch, I am reminded that the best food is meant to be shared with people you love. Happy cooking and enjoy every perfectly crunchy bite.
Recipe Q&A
- → What cut of chicken works best?
Both boneless chicken breast and thigh meat work beautifully. Thighs tend to be juicier and more forgiving, while breasts offer a leaner option. Cut either into uniform 2 cm pieces for even cooking.
- → How long should I marinate the chicken?
Marinate for at least 30 minutes to infuse flavor and tenderize the meat. For optimal results, refrigerate up to 4 hours. Avoid exceeding 4 hours as the buttermilk's acidity can make the texture mushy.
- → What's the secret to extra-crispy coating?
The double-dredging method creates the crispiest result. After the initial flour coating, dip the chicken back into the buttermilk marinade, then coat again with the flour mixture. This thick layer guarantees maximum crunch.
- → Can I bake instead of fry?
Baking won't achieve the same crispy texture as deep frying. However, you can air fry at 200°C (400°F) for 12-15 minutes, shaking halfway through. The result will be crispy but slightly different from the traditional fried version.
- → What's the best oil temperature for frying?
Maintain oil at 180°C (350°F) for optimal results. Too hot and the coating burns before the chicken cooks through; too cool and the coating becomes greasy. Use a thermometer to monitor temperature consistently between batches.
- → How do I keep them crispy after cooking?
Place fried pieces on a wire rack rather than paper towels to prevent steam from making them soggy. Avoid stacking them. If reheating, use an oven at 200°C (400°F) for 5-8 minutes to restore crispiness.