 Save
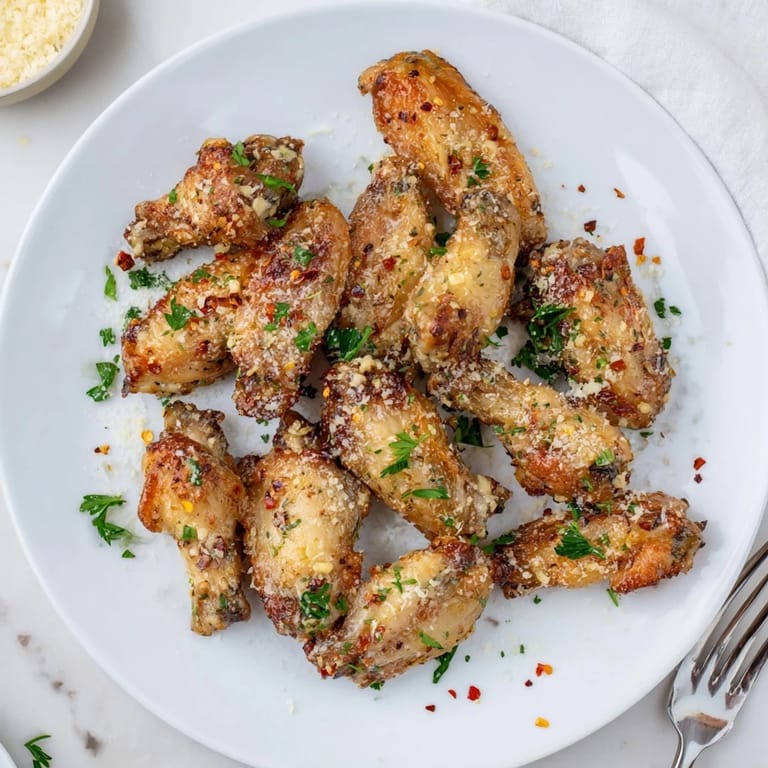
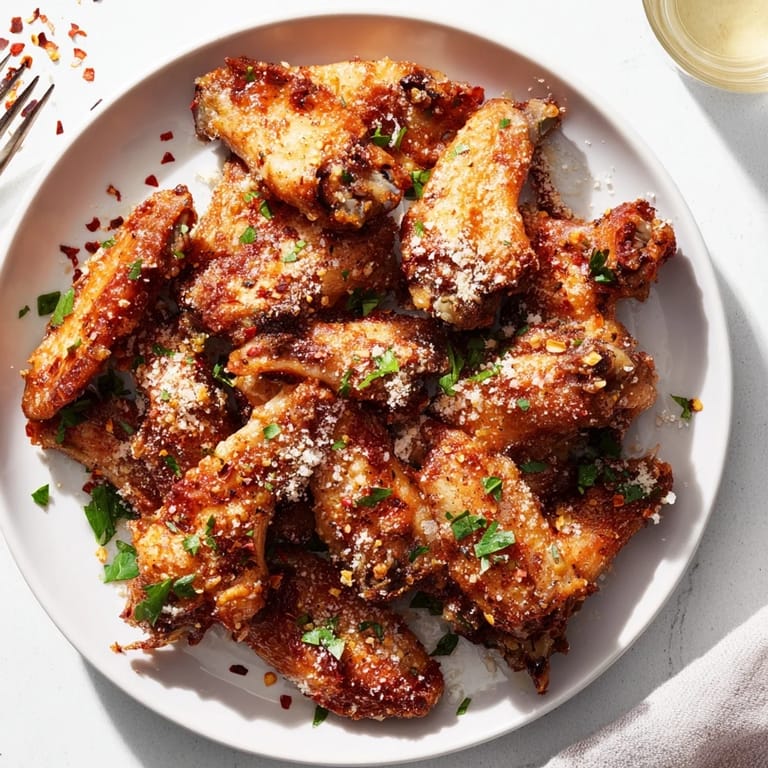
Save The smell of garlic butter hitting hot crispy skin still stops me in my tracks every single time. I started making these wings when my roommate brought home a massive bag of chicken wings from a warehouse store, and we had to figure out how to use them all before they went bad. Now they are the most requested food at every gathering I host, and honestly, they have ruined restaurant wings for me forever.
Last winter, I made three batches back to back for a snowed-in movie marathon with friends. The first batch vanished in under seven minutes, and by the time the third batch came out of the oven, people were literally hovering around the wire rack with forks.
Ingredients
- Chicken wings (1.5 lbs): Separating them yourself saves money, and I have learned that flats actually hold more sauce than drumettes
- Olive oil (1 tablespoon): Helps the seasoning stick and encourages that golden crispy skin we are all after
- Kosher salt (1 teaspoon): Essential for flavor penetration into the meat itself
- Garlic powder (1/2 teaspoon): Provides an underlying garlic note that complements the fresh garlic in the sauce
- Smoked paprika (optional): Adds subtle depth and a gorgeous color to the finished wings
- Unsalted butter (4 tablespoons): The foundation of your sauce, and using unsalted lets you control the seasoning
- Fresh garlic (4 cloves): Minced finely so it distributes evenly without any harsh raw bites
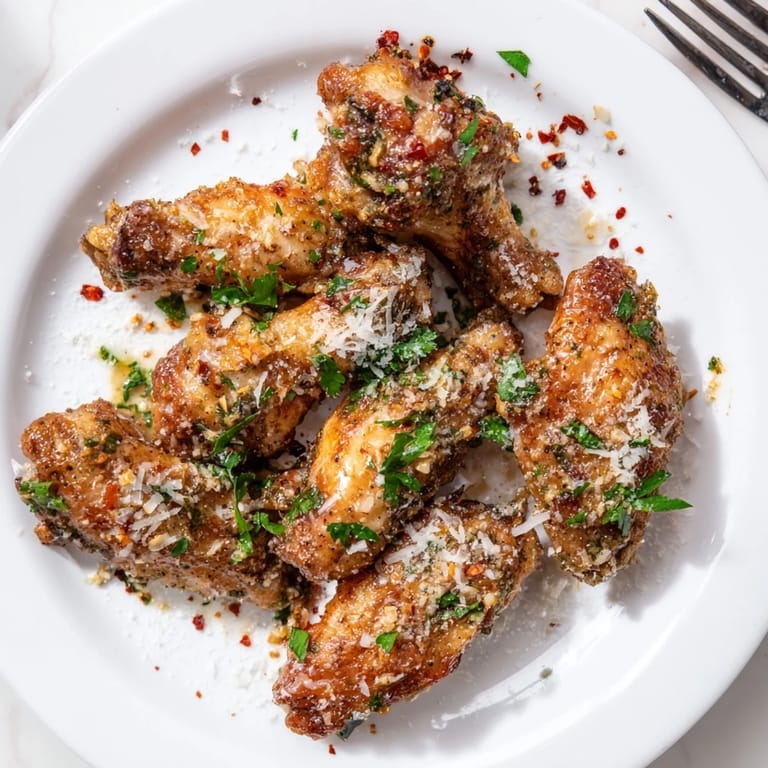
- Freshly grated Parmesan (1/3 cup plus extra): The pre grated stuff just does not melt the same way, and the flavor difference is massive
- Fresh parsley (2 tablespoons): Brightens up the rich butter sauce and makes everything look inviting
Tired of Takeout? 🥡
Get 10 meals you can make faster than delivery arrives. Seriously.
One email. No spam. Unsubscribe anytime.
Instructions
- Get your oven ready:
- Preheat to 425°F with a rack in the middle position, and line a baking sheet with parchment paper topped with a wire rack for maximum air circulation.
- Season the wings:
- Pat the wings absolutely dry with paper towels, then toss with olive oil and all the seasonings until every piece is evenly coated.
- Bake to crispy perfection:
- Arrange wings in a single layer on the wire rack and bake for 40 to 45 minutes, flipping halfway through, until deep golden and irresistibly crispy.
- Make the garlic butter:
- While wings bake, melt butter over medium heat and add minced garlic, cooking just until fragrant and softened, about 1 to 2 minutes.
- Bring it all together:
- Toss the hot wings in a large bowl with the warm garlic butter, then add Parmesan and parsley and toss again until every wing is thoroughly coated.
 Save
Save These wings became my signature when I brought them to a Super Bowl party and the host asked for the recipe before the third quarter even started. Now every friend who comes over asks if these are on the menu, and I honestly cannot imagine hosting without them.
The Crispiest Skin Secret
I discovered through trial and error that letting the wings air dry in the refrigerator for an hour before baking makes an unbelievable difference in the final texture. The cold air draws out excess moisture, and your patience is rewarded with the kind of crunch that makes people ask if you fried them.
Sauce Timing Matters
One time I made the garlic butter sauce too early and it separated while sitting, which created an oily mess instead of a cohesive coating. Now I always time it so the garlic butter is ready the exact moment the wings come out of the oven, ensuring that perfect emulsified cling.
Serving It Right
The way you present these wings actually changes the eating experience. I pile them on a platter with extra Parmesan raining down from above and a few parsley leaves scattered throughout because the visual anticipation makes that first bite even better.
- Set out a small bowl of extra sauce for dipping because some people will want more
- Keep the wings warm in a 200°F oven if you are not serving immediately
- Have plenty of napkins ready because these are gloriously messy in the best way
 Save
Save There is something deeply satisfying about making wings at home that taste better than anything you could order. Every batch feels like a small victory in the kitchen.
Recipe Q&A
- → How do I get the crispiest wings?
Pat the wings thoroughly dry with paper towels before seasoning. Using a wire rack on the baking sheet allows hot air to circulate underneath, promoting even crisping. For extra crunch, toss the wings with 1 tablespoon baking powder before baking—this helps draw moisture to the surface for a crispier skin.
- → Can I use frozen chicken wings?
Yes, thaw the wings completely in the refrigerator before proceeding. Pat them thoroughly dry to remove excess moisture, which is crucial for achieving crispy skin. Frozen wings may release more water during cooking, so you may need to bake them an additional 5-10 minutes.
- → What can I substitute for Parmesan cheese?
Pecorino Romano offers a sharper, saltier flavor profile. Aged Asiago or Grana Padano work well too. For a dairy-free option, use nutritional yeast for a savory, cheesy flavor without the dairy, though the texture and taste will differ from traditional Parmesan.
- → How do I store and reheat leftovers?
Store cooled wings in an airtight container in the refrigerator for up to 3 days. To reheat, place on a baking sheet in a 400°F oven for 10-15 minutes until heated through and crispy again. Avoid microwaving, as this makes the skin soggy.
- → Can I make these spicy?
Absolutely. Add the crushed red pepper flakes to the garlic butter sauce, or increase the amount to your preferred heat level. You could also toss the finished wings with a pinch of cayenne pepper or serve with hot sauce on the side for those who enjoy extra spice.